
If you adore the decadent blend of rich chocolate, buttery caramel, and crunchy peanuts, then this Chocolate Caramel Turtle Pie Recipe is about to become your new go-to dessert. This pie captures that unforgettable “turtle” candy flavor in a luscious, creamy treat that’s both impressive and surprisingly easy to make. Whether you prefer a smooth caramel layer or a nut-filled surprise in every bite, this dessert delivers incredible texture and flavor from start to finish, making it a guaranteed crowd-pleaser at any gathering.
Ingredients You'll Need
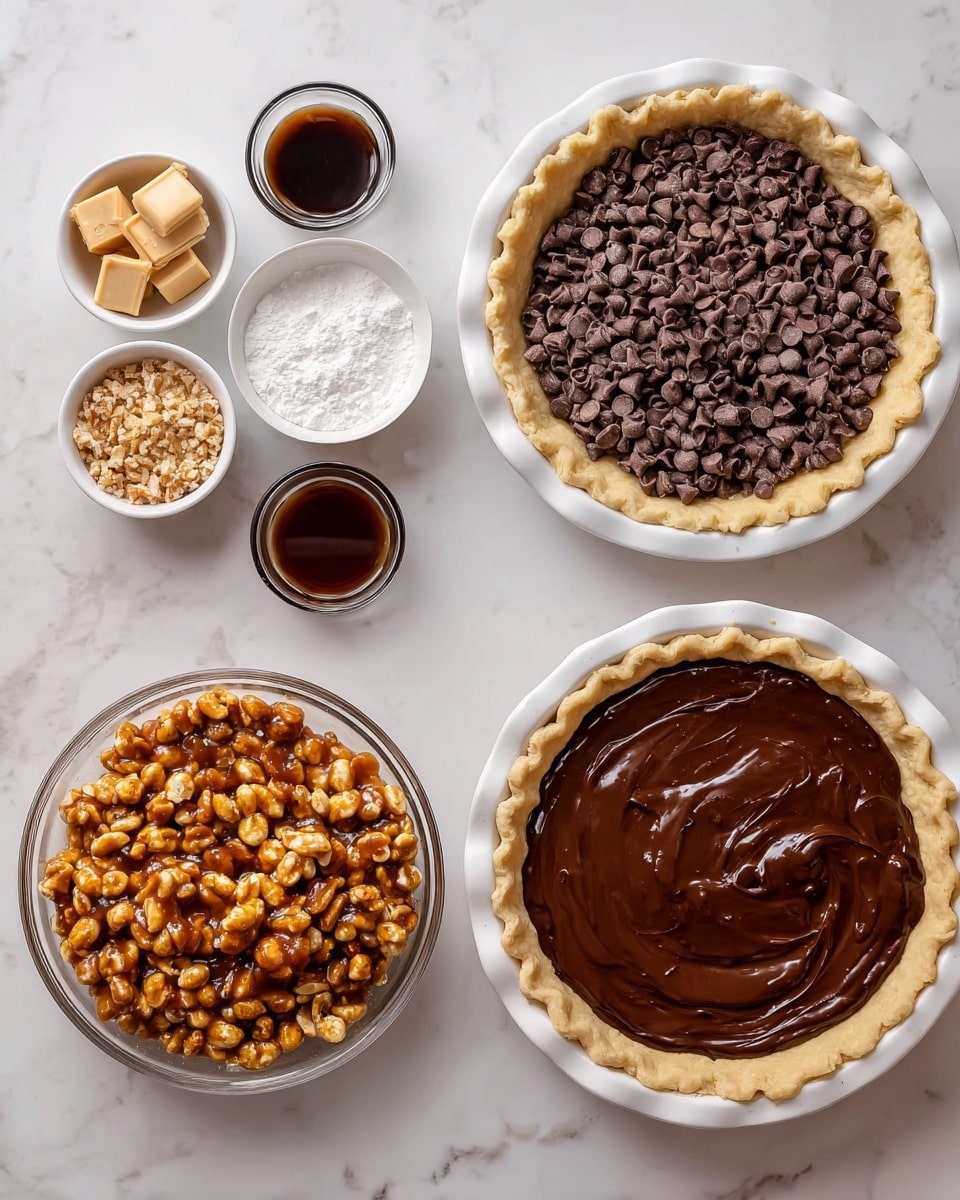
These ingredients are simple staples but each plays a crucial role in shaping the unforgettable taste and texture of the pie. From the crisp pie shell to the velvety chocolate and luscious caramel, every component works in harmony to create something truly special.
- 1 9" pie shell baked & cooled: A sturdy, buttery base to hold all the delicious layers together perfectly.
- 2 tablespoon semi sweet chocolate chips: For melting into the crust base to add rich chocolate depth right from the start.
- 1 tablespoon butter: Helps create a smooth, shiny chocolate layer in the crust that sets nicely.
- 20 caramels + ¼ cup cream or milk (or alternatives): The core caramel flavor—choose your preferred caramel style for a personal twist.
- 1 ¼ cup salted peanuts: Half chopped for crunch, half whole for satisfying nibbling in every slice.
- 1 cup semi sweet chocolate chips: For the creamy chocolate whipped topping layer.
- 2 tablespoon butter: Melted into the chocolate topping to keep it smooth and luscious.
- 8 oz container Cool Whip: Lightens up the chocolate topping, making it fluffy yet rich.
- Additional whipped cream, chocolate & caramel drizzle, and peanuts (optional): To make your pie look spectacular and taste even better when serving.
How to Make Chocolate Caramel Turtle Pie Recipe
Step 1: Create the Chocolate Crust Layer
Begin by melting 2 tablespoons of semi-sweet chocolate chips with 1 tablespoon of butter in the microwave until smooth. Spread this magical mixture evenly across the bottom of your baked pie shell. Pop it into the fridge for a few minutes to set—it forms a rich, fudgy foundation that keeps the crust from getting soggy once you add the luscious caramel layer later.
Step 2: Prepare the Caramel Peanut Layer
Now for the star of our Chocolate Caramel Turtle Pie Recipe! Melt your chosen caramel option—whether it’s 20 caramels softened with cream, a caramel sundae syrup thickened with flour, or homemade caramel syrup with milk—in the microwave, stirring frequently until silky smooth. Cool it just a little, then fold in the salted peanuts, evenly distributing that wonderful crunch and salty balance. Pour this mixture over the chocolate-coated crust. You have two options here: chill the caramel-peanut layer before the next step for a more distinct layered look, or skip chilling to let the caramel sit against the edges of the crust for a gooier caramel presence in the final pie.
Step 3: Whip Up the Chocolate Cool Whip Topping
While your caramel sets, melt 1 cup of semi-sweet chocolate chips with 2 tablespoons of butter until creamy and smooth. Let this cool for about 15 minutes so it doesn't melt the whipped topping too much. Then gently fold about one-third of the Cool Whip into the cooled chocolate mixture to lighten it, followed by the remaining Cool Whip to create a fluffy, cloud-like topping with intense chocolate flavor. Spread this heavenly layer over the caramel-peanut base and refrigerate for at least 4 hours, but ideally overnight or even longer, to let all those flavors meld into pure bliss.
How to Serve Chocolate Caramel Turtle Pie Recipe

Garnishes
Make your pie look as delightful as it tastes by adding a generous swirl of whipped cream at serving time. Drizzle on extra caramel and chocolate syrup for that irresistible glossy finish, and sprinkle a handful of salted peanuts on top to echo the delicious crunch within the pie. These final touches not only elevate the presentation but create bursts of flavor in every bite.
Side Dishes
This pie shines best as a dessert star, but it pairs wonderfully with simple accompaniments like fresh berries or a scoop of vanilla ice cream. The bright fruit helps cut through the rich sweetness, while the ice cream adds a cool contrast that your guests will love.
Creative Ways to Present
If you want to wow friends or family, consider slicing the Chocolate Caramel Turtle Pie Recipe into mini tartlets using a tart pan or serving in clear glass dishes to showcase those beautiful layers. Adding edible gold leaf or a sprinkle of sea salt on top can also bring a gourmet touch. No matter the presentation, the taste will steal the show.
Make Ahead and Storage
Storing Leftovers
Keep leftovers tightly covered in the refrigerator for up to 3 days to maintain freshness. This pie actually gains flavor and texture as it rests, so it’s perfectly fine to enjoy it a day or two later—if it lasts that long!
Freezing
You can freeze this pie by wrapping it securely with plastic wrap and then foil for up to a month. Thaw it in the refrigerator overnight before serving to preserve its texture and taste. Just keep in mind the whipped topping might lighten slightly after freezing but will still taste divine.
Reheating
This dessert is best served cold, so reheating is not recommended. If you want a softer slice, simply let it sit at room temperature for about 15-20 minutes before digging in.
FAQs
Can I use salted or unsalted peanuts?
Salted peanuts are recommended as they provide a perfect sweet-salty balance that complements the caramel and chocolate layers beautifully. If you only have unsalted peanuts, you might want to sprinkle a tiny bit of sea salt on top before serving.
What if I don’t have Cool Whip? Can I use homemade whipped cream?
Absolutely! Homemade whipped cream works wonderfully. Just make sure it’s stabilized a bit so the pie holds its shape well when sliced, especially if you plan on storing it for a couple of days.
Can I make this pie vegan or dairy-free?
This recipe relies heavily on dairy ingredients, but you can adapt it by using vegan butter, dairy-free caramel alternatives, dairy-free chocolate chips, and coconut whipped cream. The texture might change slightly but the flavors can still be incredibly delightful.
What’s the best way to chop the peanuts?
Use a sharp knife to roughly chop about half of the peanuts. You want chunks that are not too small so they add a nice crunch but aren’t so large that they overwhelm the slice.
How long should I let the pie chill before serving?
The longer, the better! At least 4 hours is a must to let layers set properly, but 24 to 48 hours chilling in the fridge will really let those flavors meld and the texture settle into something perfectly sliceable and delicious.
Final Thoughts
I can’t recommend this Chocolate Caramel Turtle Pie Recipe enough—it truly brings together all those classic turtle candy flavors in one luscious, dreamy dessert. It’s a showstopper that’s surprisingly easy to prepare and sure to become a cherished favorite whether it’s a holiday, special occasion, or just any day that calls for a little indulgence. Give it a try and get ready for the compliments to pour in!
Print
Chocolate Caramel Turtle Pie Recipe
- Prep Time: 15 minutes active + 6 hours chilling
- Cook Time: 10 minutes (melting steps)
- Total Time: 6 hours 15 minutes
- Yield: 8 servings
- Category: Dessert
- Method: No-Cook
- Cuisine: American
Description
This decadent Chocolate Caramel Turtle Pie features a buttery pie crust layered with rich semi-sweet chocolate, luscious caramel and salted peanuts, and a creamy chocolate Cool Whip topping. With options for caramel preparation and a luscious garnish of whipped cream, chocolate drizzle, caramel drizzle, and peanuts, this dessert is perfect for special occasions or anytime you crave a deliciously indulgent treat. The pie requires chilling time to set the layers, resulting in a creamy, nutty, and chocolaty flavor harmony.
Ingredients
Crust
- 1 9-inch pie shell, baked & cooled
- 2 Tbsp semi-sweet chocolate chips
- 1 Tbsp butter
Caramel Layer (choose one)
- 20 caramels + ¼ cup cream or milk, stirred together
- OR ½ cup caramel sundae syrup + 2 Tbsp flour, stirred together
- OR ½ cup homemade caramel syrup + 2 tablespoon milk (used in this recipe)
- 1 ¼ cup salted peanuts (about ½ cup chopped, rest whole)
Chocolate Layer
- 1 cup semi-sweet chocolate chips
- 2 Tbsp butter
- 8 oz container Cool Whip
Optional Garnish
- Additional whipped cream
- Chocolate drizzle
- Caramel drizzle
- Peanuts
Instructions
- Prepare Chocolate Base: Melt 2 tablespoons butter and 2 tablespoons semi-sweet chocolate chips in the microwave until smooth. Spread this chocolate mixture evenly on the bottom of the baked pie crust. Chill for a few minutes until set to create the chocolate base layer.
- Make Caramel Layer: Melt your chosen caramel option - either caramels with cream, caramel sundae syrup with flour, or homemade caramel syrup with milk - in a microwave-safe bowl, stirring frequently until smooth. Let cool slightly, then stir in salted peanuts (about ½ cup chopped and remainder whole). Pour this caramel-peanut mixture into the pie shell over the chocolate base. You can chill this layer to set it or proceed immediately to the next step.
- Prepare Chocolate Cool Whip Mixture: Melt 1 cup semi-sweet chocolate chips with 2 tablespoons butter in the microwave, stirring until smooth. Allow this mixture to cool for 15 minutes. Then gently fold one-third of the Cool Whip into the cooled chocolate mixture, followed by folding in the remaining Cool Whip to maintain a light and fluffy texture.
- Assemble and Chill Pie: Spread the chocolate Cool Whip mixture evenly over the caramel-peanut layer in the pie shell. Chill the entire pie for at least 4 hours, preferably overnight, to allow it to set properly. For best flavor and texture, refrigerate for 1 to 2 full days.
- Garnish and Serve: Just before serving, garnish the pie with additional whipped cream, caramel drizzle, chocolate drizzle, and peanuts as desired for extra flavor and presentation.
- Optional Caramel Layer Chilling: You may choose to chill the caramel-peanut layer before adding the chocolate Cool Whip topping for a firmer bottom with more visible caramel and peanuts. Alternatively, skip chilling the caramel layer and immediately add the chocolate Cool Whip, which will cause the caramel to spread up the sides and peek through the top, offering a different visual and textural effect. Both methods yield delicious results.
Notes
- The caramel layer can be made using three different methods—choose based on your preference or availability.
- Chilling times are crucial to achieve the proper set and texture—don’t rush the refrigeration step.
- Folding the Cool Whip gently into the cooled chocolate prevents deflating the mixture, keeping the topping light and fluffy.
- Use salted peanuts for the classic sweet and salty flavor contrast.
- Optional garnishes elevate the presentation and add texture.
- Pie is best served chilled and can be stored in the refrigerator for up to 3 days.


Leave a Reply